Transfer
The Transfer page is where you’ll move your crypto assets seamlessly between different blockchain networks. Stargate is designed to make this process as efficient and user-friendly as possible.
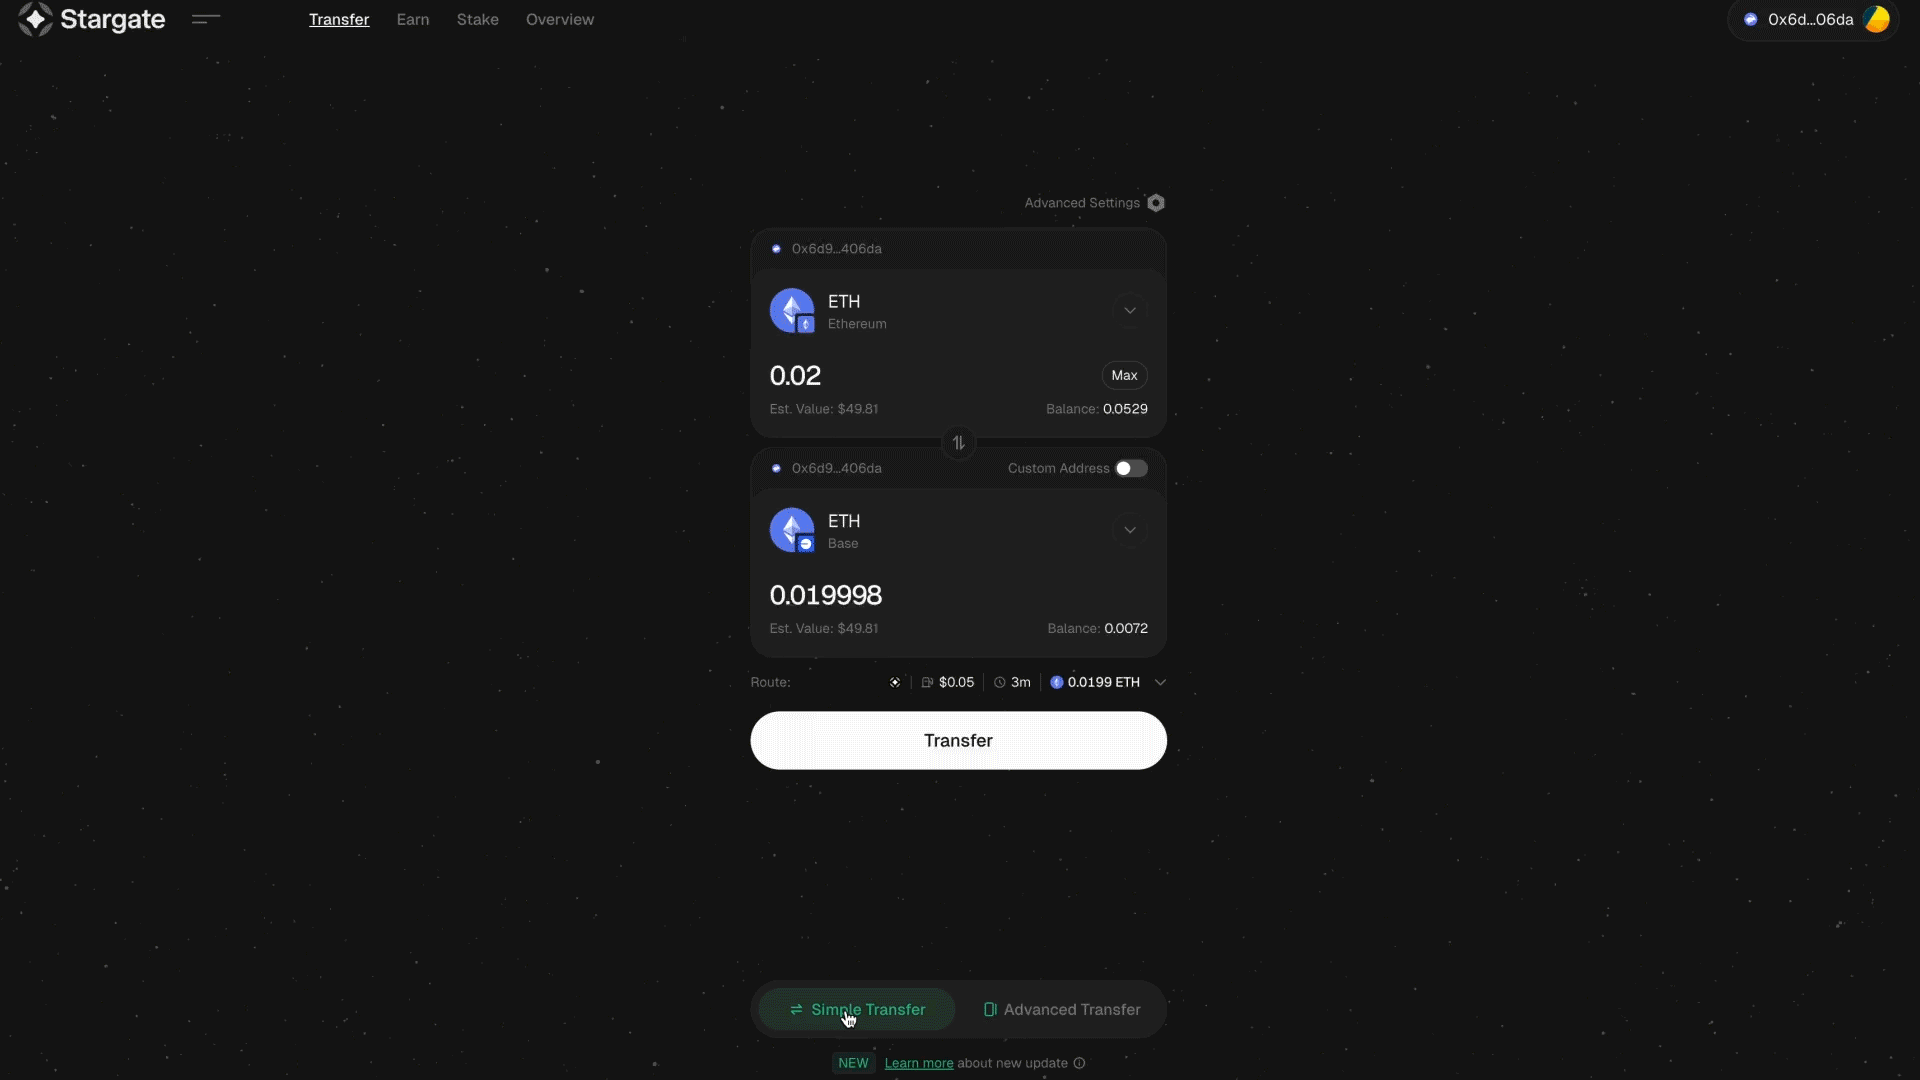
Understanding Transfer Modes: Simple vs. Advanced
Simple Transfer Mode
- Purpose: This mode is designed for the most common use case: sending assets from your connected wallet on one chain to your same connected wallet address on another chain. It streamlines the process by minimizing the number of options you need to configure.
- How it works: You select the source chain, source token, destination chain, and destination token. The destination address is automatically set to your currently connected wallet address.
- Best for: Users who want a quick, straightforward way to move their own assets between their accounts on different networks.
Advanced Transfer Mode
- Purpose: This mode offers more control and flexibility, primarily by allowing you to specify a custom destination address.
- Key Difference: In the “To” (destination) section, you will see your connected wallet address by default, but you’ll have an option (often a toggle labeled “Custom Address” or similar) to input any valid address on the destination chain.
- Best for: More complex transfer scenarios where the source and destination wallets/owners differ.
Selecting Your Transfer Route
Route Display & Selection
After you input the amount, the interface will display information about the transfer, including estimated fees, transfer time, and the amount you’ll receive.
- Recommended Route: Currently defaults to the fastest route, but this may change in the future as advanced routing selection is implemented.
- Fastest Route: Prioritizes speed, potentially with slightly higher fees.
- Cheapest Route: Prioritizes lower fees, potentially with a slightly longer transfer time.
Understanding Slippage
“Slippage” is a term that refers to the difference between the expected price of a trade (or in this case, the expected amount of tokens you’ll receive) and the price at which the trade is actually executed. This can happen in volatile markets or when dealing with pools that have lower liquidity.
Slippage Tolerance
- In Stargate (often found under “Advanced Settings” on the Transfer page), you can set your slippage tolerance. This is a percentage (e.g., 0.5%, 1%) that defines the maximum unfavorable price change you are willing to accept for your transfer to go through.
- Example: If you set slippage to 1% and expect to receive 100 USDC, your transfer will still proceed if you receive between 99 USDC (1% less) and 101 USDC (1% more, though positive slippage in your favor is less common to guard against). If the price moves more than 1% against you during the transaction processing, the transaction will fail to protect you from excessive losses.
Why it Matters
- Low Slippage Setting (e.g., 0.1%): More likely to protect you from price changes, but your transaction might fail more often in volatile conditions if the price moves even slightly.
- High Slippage Setting (e.g., 3%): Your transaction is more likely to succeed even if prices move, but you risk receiving significantly fewer tokens than initially expected.
Stargate’s Approach
While traditional slippage relates to price movement in AMMs, in a bridge like Stargate, it can also relate to the final amount received after accounting for fees and cross-chain dynamics. The UI might also use terms like “Max Fee” or similar in conjunction with or instead of traditional slippage, so pay close attention to the labels.